Tag Archives: Recipes

{ Mulled Red Wine with Amaretto }

WD-10-Mulled-Wine

Last week I had the opportunity to visit London, and I was awestruck by the number of street vendors selling mulled wine and hot cider–not mention awestruck by the number of Brits consuming these boozy concoctions irregardless of the time of day! I was determined to try as many different varieties of each during my 9 day stay, and given the dominant role that alcohol plays in English society, there were plenty of opportunities for me to warm up with a cup of spiced and spiked goodness!

At Hyde Park’s Winter Wonderland, I was able to double fist German sausages and mulled wine, in between playing over priced amusement games. I took a fond liking to the sour cherry wine and the amaretto wine, but set out to replicating the latter on this snowy afternoon in the States. I used Jamie Oliver’s mulled wine recipe as the foundation for my technique, but also added the apple cider element of Ina Garten’s recipe. The amaretto was a touch of my own, inspired by the street vendors in London and the result was a fabulous, soul-warming Holiday beverage. I will be making this on the many chilly nights that are yet to come!

IMG_3126

{ What You’ll Need }

  • 1.5 L bottle of red wine (I used Robert Mondavi Merlot, but many prefer a dry red)
  • 2 oranges, peeled and juiced
  • 1 lemon, peeled
  • 1 cup of sugar
  • 2 cinnamon sticks
  • 6 whole cloves
  • 2 fresh bay leaves
  • 1 vanilla bean, halved lengthways
  • 3 star anise
  • 4 cups apple cider
  • Amaretto, for garnish (you can also use brandy!)

IMG_0687

{ What You Do }

In a stock pot over medium high heat, combine the sugar, cloves, lemon peels, bay leaves, vanilla bean, cinnamon sticks, and orange peel and juice. Add just enough red wine to cover the sugar and spice mixture and allow to boil for 4-6 minutes, until the sugar mixture is thick and syrup-like (see NOTE #1).

IMG_0691

Add the remaining red wine, apple cider, and star anise and reduce the heat to low. Allow the wine to heat through, but don’t let it get too hot or the alcohol will burn off. Once heated, ladle into mugs and garnish with orange wedge and splash of amaretto! (see NOTE #2)

3-1

*NOTE #1: This step is very important as it develops the flavor of the mulled wine. You want a flavorful rich syrup, so let it reduce down. You don’t want to over-heat the wine mixture once you add the remaining wine or it will burn off all the alcohol content–and who would want that?!?!

*NOTE #2: If you have leftover mulled wine, ladle it into Mason Jars and store in refrigerator for up to 4 days or in freezer for up to 3 months. Just reheat prior to serving.

Leave a comment

Filed under Bars, BYOB, Cocktails, Markets, Recipes

{ Applesauce Multigrain Muffins }

IMG_2763

You know those suggested recipes posted on the side of food packaging? Well, this recipe hails from the side of a Trader Joe’s multigrain oatmeal box. I normally make my signature “flat belly bran muffins,” but I was in the mood to try something new and this recipe seemed straightforward and delicious!

multigrain-hot-cereal

 I followed the recipe on the box exactly as printed, and enjoyed the flavor and texture, but I would definitely amp them up next time by throwing in some chopped walnuts and raisins. The muffins tasted best right out of the oven and topped with a little bit of Greek yogurt, but they did not stay fresh very long so eat them up quickly or freeze them!

This recipe makes a much softer muffin than my flat belly bran recipe, but it begs for some fruit and nut pieces for added texture.

IMG_2762

{Streusel Topping Ingredients}

  • 1/3 cup Country Choice Multigrain Hot Cereal (uncooked)
  • 2 tablespoons organic brown sugar
  • 1 tablespoon butter, melted
  • ½ teaspoon ground cinnamon

{Muffin Ingredients}

  • 1 cup Country Choice Multigrain Hot Cereal (uncooked)
  • 1 ½ cups flour
  • 1 teaspoon baking powder
  • ½ teaspoon baking soda
  • ½ teaspoon ground cinnamon
  • 1 cup unsweetened applesauce (I used Trader Joes)
  • ½ cup fat free milk
  • ½ cup organic brown sugar
  • ¼ cup sunflower oil
  • 1 egg

 {To Make the Muffins}

Preheat the oven to 400 degrees. Line 12 muffin cups with paper liners.

Prepare the streusel topping by combining the oats, brown sugar, and cinnamon. Then add the melted butter and mix well.

Prepare muffins by combining oats, flour, baking powder, baking soda, and cinnamon in a large bow: mix well. In a separate bowl, mix together the applesauce, ilk, brown sugar, oil, and egg. Add to the dry ingredients and stir just until the dry ingredients are moistened.

Bake for 18-20 minutes. Remove from oven. Serve warm*

*We served ours with homemade peach jam!

IMG_2759

1 Comment

Filed under Baking, Breakfast, Brunch, Cakes, Muffins, Recipes

{ Thanksgiving Pizza }

IMG_2680

I consider sage to be the dominant flavor of Thanksgiving. My mom and I use it in just about every dish, from our roasted butternut squash, to our stuffing, and our delicious turkey butter baste! So when a customer at my restaurant requested that I come up with a recipe for a Thanksgiving-inspired pizza special, I knew sage would be the foundational building block of the pie.

The savory, and slightly peppery, flavor of sage lends itself well with just about any ingredient but since I needed to construct a pie that tasted like Thanksgiving, I decided to pair it with butternut squash, caramelized onions, and cranberry sauce. Instead of using just mozzarella, I opted to add brie cheese which is a soft French cheese made from cow’s milk. The creamy cheese melts very easily when baked and the sweetness of the cheese lends itself well with the tartness of the cranberry sauce.

I have served this pizza to several taste-testers thus far, and each of them have said the same thing…”tastes like Thanksgiving!”

I consider that mission accomplished.

{ Ingredients }

  • One pizza crust — I use this recipe by Peter Reinhart
  • 1 can whole berry cranberry sauce
  • 1 butternut squash, roasted, peeled, and cubed
  • 1 wedge brie cheese
  • 1 cup shredded mozzarella
  • 1 spanish onion, sliced, and caramelized
  • 1 bunch fresh sage leave, chopped

{ To Make the Pizza }

Preheat the oven to 450 degrees.

Using a spatula, spread the cranberry sauce over the prepared pie crust to the outer edges. Lightly sprinkle the shredded mozzarella cheese over the cranberry sauce. Thinly slice the brie cheese and place slices onto the pie a few inches apart from each other.

Top the cheese with the caramelized onion and the cubed butternut squash.

Bake for about 10 minutes, or until the edges turn a golden brown and the crust is crispy.

Sprinkle with the chopped sage and serve!

IMG_2677

Leave a comment

Filed under Baking, Brunch, Holiday Recipes, Recipes

{ Italian Florentine Cookies }

Florentine

Last week I blogged my recipe for Italian seven-layer cookies, and this week I am sharing my recipe for another classic Italian Christmas cookie: Almond Florentines. Also known as lace cookies, Florentines are an extremely delicate, paper-thin cookie made of macerated almonds and orange zest. They are crunchy and sweet, and with the chocolate drizzle on top–optional in this recipe, but a must for me!–they are absolutely decadent.

I like to make these for the holidays because other people so often gravitate towards making softer dough cookies like sugar cookies, spritz cookies, and snickerdoodles. Baking something with a little crunch factor helps to set you apart from the other women at the neighborhood cookie exchange!

{ Ingredients }

  • 1 3/4 cups sliced, blanched almonds (about 5 ounces)
  • 3 tablespoons all-purpose flour
  • Finely grated zest of 1 orange (about 2 tablespoons)
  • 1/4 teaspoon fine salt
  • 3/4 cup sugar
  • 2 tablespoons heavy cream
  • 2 tablespoons light corn syrup
  • 5 tablespoons unsalted butter
  • 1/2 teaspoon pure vanilla extract

Chocolate Topping, optional:

  • 2 to 4 ounces semisweet chocolate, chopped

{ To Make the Italian Florentine Cookies }

Position a rack in the center of the oven and preheat to 350 degrees. Line a baking sheet with parchment paper.

Pulse the almonds in a food processor until finely chopped, but not pasty. Stir together the nuts, flour, orange zest, and salt in a large mixing bowl.

Put the sugar, cream, corn syrup, and butter in a small saucepan. Cook over medium heat, stirring occasionally, until mixture comes to a rolling boil and sugar is completely dissolved. Continue to boil for 1 minute. Remove from heat and stir in the vanilla, then pour mixture into almond mixture and stir just to combine. Set aside until cool enough to handle, approx. 30 minutes.

Scoop rounded teaspoons (for 3-inch cookies) or rounded tablespoons (for 6-inch cookies) of batter and roll into balls. Place on prepared baking sheet, leaving about 3 to 4 inches between each cookie since they spread (and trust me, they do!!!).

Bake 1 pan at a time, until the cookies are thin and an even golden brown color throughout, rotating pans halfway through baking time, about 10 to 11 minutes. Cool on baking sheet for 5 minutes, then transfer to racks to cool. Repeat with remaining batter. Serve.

{ MUST HAVE  Chocolate Topping Drizzle }

Set up a classic double broiler system by putting the chocolate in a medium heatproof bowl. Then bring a saucepan filled with 1 inch or so of water to a very low simmer; set the bowl of chocolate over the saucepan so that it is just above, but not touching, the water. Stir the chocolate occasionally until melted and smooth.

Chocolate in a double boiler

Drizzle melted chocolate over Florentines as desired. Set aside at room temperature until chocolate is set.

Florentine-Cookies-40-1024x871

**Store baked cookies carefully, separated by parchment or waxed paper, in an air-tight container for up to 3 days. Florentines are best stored separated from moist cookies and cakes.

IMG_0444

Leave a comment

Filed under Baking, Cookies, Dessert, Recipes

{ Kendall’s Bourbon Spiked Cider }

cider-burbon-drink-mslb7022_vert

Nothing says fall quite like apple cider, and this bourbon-spiked cocktail will have you appreciating cider in a whole new way. It is light but warms you from the inside out.

If you happen to live in Bucks County, PA and like Bourbon-based cocktails, I would suggest checking out M.O.M.s on Main Street in Doylestown. They have a fantastic selection of bourbon inspired cocktails, which is why they are my favorite spot right now. I would also recommend heading over to Solebury Orchards to pick get some of their seasonal honey crisp apples and homemade cider! It is the absolute best!

1375132_10153338834950389_488872779_n

{ Ingredients }

  • 3/4 cup apple cider (I get mine locally from Solebury Orchards)
  • 1/3 cup bourbon (I used Maker’s Mark)
  • 2 tablespoons fresh lemon juice
  • 2 thin slices of fresh peeled ginger
  • 2 thin slices of apple for garnish

{ To Make Cocktail }

Fill a cocktail shaker with ice. Add the cider, bourbon, lemon juice, and ginger. Shake well to combine. Strain cocktail into 2 coupes. Garnish with apple slices.

I also like mine on the rocks with crushed ice!

apple-cider-cocktails-scene1

1 Comment

Filed under Bars, Buck's County, Cocktails, Gluten Free, Recipes

{ Italian Seven Layer Cookies }

IMG_0474edited

I come from a long lineage of family bakers. Cream and sugar are literally coded in my DNA.

And when I was growing up, the holidays signified one thing: cookie season! I would come home from school and my mom would have magazine clippings for cookie recipes that she wanted to try out at one of her infamous cookie exchanges. Given that it was not warm enough to play outside, she would encourage my sister and I to help her sift the flour, roll out the dough, and dip/glaze/sprinkle the tops of cookies in an effort to keep us from turning on the television (or the ‘boob-tube’ as it was referred to in my house!). Of course, we were always more more than happy to oblige!

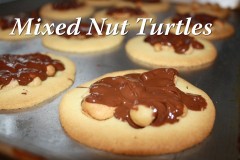
We would make dozens of spritz cookies, sugar cookies, gingerbread cookies, chocolate chip cookies, pecan tassies, mixed nut turtles, and traditional Hungarian kiffles. But the one cookie we never made, was ironically the one that was my favorite–the Italian seven layer cookie.

Whenever I would spot these in a party tray assortment, I would pick them out, stuff them in a napkin, and then scurry away to eat them by my lonesome. I was–and still am–an Italian cookie fein and hoarder.

This year, I decided to make my own seven layer cookies using the recipe printed in Gourmet, December 2005, and since them endorsed by The Smitten Kitchen food blog. I will admit that they were quite laborious and involved to make, but since they can be frozen in large blocks, I will have them to enjoy/gift over the next few months (or weeks, depending on my level of self-control!).

3114755998_69d8f2f352

{ Ingredients }

  • 4 large eggs, separated
  • 1 cup granulated sugar
  • 1 (8 oz) can of almond paste
  • 2 1/2 sticks of unsalted butter, softened
  • 1 teaspoon almond extract
  • 2 cups all purpose flour
  • 1/2 teaspoon salt
  • 25 drops red food coloring
  • 25 drops green food coloring
  • 1 (12 oz) jar of apricot preserves, heated and strained
  • 7 oz of good-quality bittersweet chocolate (not unsweetened), roughly chopped

{ To Make Italian 7-layer Cookies }

Place oven rack in middle position and preheat oven to 350°F. Butter a 13- by 9-inch baking pan and line bottom with wax paper, leaving a 2-inch overhang on two of the ends, then butter paper.

Beat egg whites in mixer fitted with whisk attachment at medium-high speed until they just hold stiff peaks. Add 1/4 cup sugar a little at a time, beating at high speed until whites hold stiff, slightly glossy peaks. Transfer to another bowl.

Switch to paddle attachment, then beat together almond paste and remaining 3/4 cup sugar until well blended, about 3 minutes. Add butter and beat until pale and fluffy, about 3 minutes. Add egg yolks and almond extract and beat until well combined, about 2 minutes. Reduce speed to low, then add flour and salt and mix until just combined.

Fold half of egg white mixture into almond mixture to lighten, then fold in remaining whites gently but thoroughly.

Divide batter among 3 bowls. Stir red food coloring into one and green food coloring into another, leaving the third batch plain. Set the white batter aside. Cover the green batter with plastic wrap and chill in fridge.  Pour the red batter into the prepared pan and spread evenly with offset spatula (layer will be about 1/4 inch thick).

Bake red layer 8 to 10 minutes, until just set. (It is important to undercook. They’ll look like they’re not done, but a tester does come out clean.)

Using the paper overhang, transfer the layer to a rack to cool, about 15 minutes. Clean pan, then line with parchment or wax paper and butter paper in same manner as above. Bake white layer in prepared pan until just set. As white layer bakes, bring green batter to room temperature. Transfer white layer to a rack. Prepare pan as above, then bake green layer in same manner as before. Transfer to a rack to cool (see note #1).

When all layers are cool, invert green layer onto a parchment or wax-paper-lined baking sheet. Discard paper from layer and spread half of the apricot preserves on top. Invert white layer on top of green layer, discarding paper. Spread with remaining apricot preserves. Finally, invert the red layer on top of white layer and discard wax or parchment paper (see note #2).

3111716910_857db7beb1_m

Cover entire “layer-cake” with plastic wrap and weight down with a large baking pan (I stacked cook books on mine for extra weight!). Chill for at least 8 hours. BE PATIENT!

3110888019_5cedcfe6d8_m

Remove weight and plastic wrap. Bring layers to room temperature. Melt chocolate in a double boiler or a metal bowl set over a saucepan of barely simmering water, stirring until smooth. Remove from heat. Keep chocolate over the hot water.

Trim edges of assembled layers with a long serrated knife so they are clean lines. Quickly spread half of chocolate in a thin layer on top of cake. Chill, uncovered, until chocolate is firm, about 15 minutes. Cover with another sheet of wax paper and place another baking sheet on top, then invert cake onto sheet and remove paper. Quickly spread with remaining chocolate. Chill until firm, about 30 minutes.

Cut lengthwise into desired number of strips, depending on the size and number of cookies that you want to yield. I cut mine into 10 I believe.   Cut strips crosswise into 3/4-inch-wide cookies  (see note #3).

**Do ahead: Cookies keep, layered between sheets of wax paper or parchment, in an airtight container at room temperature 2 weeks. They’ll keep even longer in the freezer.

Three important notes:

Note #1Don’t stack the cakes during the cooling process: Not because they crush each other (they won’t) or because they’ll stick (they don’t), but because that paper liner is greased on both sides from baking and the chocolate shell won’t quite stick right to exterior of the red layer because of the grease accidentally left on it.

Note #2Be careful dividing your jam: If there is too much jam between one of the layers, it will ooze out when you cut the cake with a serrated knife. Sadly, the cookie will fall apart.

Note #3They’re easier to cut when frozen: Nevertheless, they tasted amazingly and I was all ready to do a victory lap around my wee kitchen counter, however, when I got to cutting them up and then it all went south. People, these were trying to cut. The problem lies within the differing textures of the layers — the top hard chocolate shell more benefits from a sharp serrated knife (a regular, even very sharp knife will crack the edges when you press down on it), the same serrated knife that gets gummed with jam and tries to pull the soft cake layers in between apart. It was exasperating. It didn’t go well. I packed up some for a party and stuffed the rest in the freezer, only to discover the next day that these cut fantastically when frozen. Seriously. Trust me. I have the gummy floor and gray hairs to prove it.

3114754008_186ca63709

5 Comments

Filed under Baking, Cookies, Dessert, Holiday Recipes, Recipes

{ Asian Sesame Noodles }

Asian Sesame Noodles

I love cold pasta salads.

…..which is probably why Whole Foods rapes my wallet every time that I set food in their prepared food’s aisle–I am an absolute sucker for their Asian Sesame Noodles. For those of you not living on a budget, let me just tell you that veggie-laced pasta is not forgiving on the scale at check-out. If your watching your spending, go for the spinach leaves, bean sprouts, mushrooms, seeds, and sun-dried tomatoes because they are light weight ingredients but don’t even think about cucumbers, tomatoes, or fresh fruit unless you want Whole Foods to take your Whole Paycheck!

It never ceases to amaze me how one tiny brown box of protein-less pasta can equate to a meal upwards of $10, but of course I ponder this while handing over my credit card to pay the cashier for my overpriced, yet highly anticipated, meal. Tonight I just couldn’t justify it though. Between my sparkling probiotic beverage and my sesame noodles, I was going to be out at least $15, so I passed on the salad bar and set out to make my own Asian noodle dish using whatever I already had in the pantry at home. Fortunately, that included an box of buckwheat Soba noodles that I had bought for a previous recipe and never used!

This recipe is nothing like the Whole Foods Asian noodles, but it incorporates a lot more veggies and makes for a more satisfying meal, especially if topped with grilled chicken, pork tenderloin, or tofu. It is very easy to make, and holds in the fridge for about 3 days without drying out.

The Whole Foods noodles will continue to tempt me, but this recipe is a fantastic alternative and entirely more budget friendly.

{ Ingredients }

  • 1 package of soba noodles
  • 1 teaspoon sesame oil
  • 2 tablespoon rice wine vinegar
  • 3 tablespoons soy sauce
  • 1 tablespoon hot chili oil
  • 1 tablespoon hoisin sauce
  • 1-2 teaspoons Sriracha
  • 4-5 tablespoons EVOO (depending on how much dressing you like)
  • 1 carrot, julienned
  • 4 green onions, thinly sliced
  • 1/2 cup shredded napa cabbage
  • 1/2 red bell pepper, julienned
  • 1 cup bean sprouts
  • 3 tablespoons fresh cilantro leaves, minced
  • 3 tablespoons black toasted sesame seeds
  • 4 tablespoons unsalted peanuts, crushed for garnish

{ To Make the Noodles }

Cook soba noodles according to package directions. When finished, place the noodles in an ice water bath to cool, and then drain and set aside.

In a medium bowl, combine the sesame oil, rice wine vinegar, soy sauce, hoisin sauce, chili oil, and EVOO. Mix well with a whisk.

Combine the noodles, prepared vegetables, and cilantro and toss with sauce until evenly coated.

Top with toasted sesame seeds and chopped peanuts, and serve with a wedge of lime.

Leave a comment

Filed under Asian Cuisine, Recipes

Sparkling Pomegranate Red Sangria *****

red-wine-sangria

Sangria is one of those drinks that reminds me of summer. It is a light and refreshing beverage to be enjoyed outside on a patio somewhere, and preferably with some good Mexican fare!

I tend to gravitate to red sangria over it’s fruitier white counterparts, because I am not the biggest fan of peach schnapps or flavored brandy. This being said, I also don’t like red sangria that tastes like spiked fruit juice (which is the case at 90% of the bars/restaurants I’ve ordered it from!). You end up drinking like 10 glasses of it in an effort to catch a buzz, only to get a sugar high that is generally followed by a massive migraine the following morning….not to mention the 800 calories you’ve also consumed. No thank you.

So tonight, I was on a mission to create my own unique sangria recipe that would taste delicious and also have my friends on their asses after only two glasses. I am proud to say “mission accomplished” with this one-of-a-kind sparkling pomegranate red sangria, which is without doubt the best sangria that I have ever tasted (my friends would second that statement too!).

The trick is to allow the flavors to develop overnight, by making the sangria ahead of time. I also like to use a merlot wine as the base of the sangria because it is a dry wine but has natural hints of berries, plums, and currants, which lend themselves well to the other fruity flavors, especially the pomegranate spritzer used to top off the beverage before serving!

 { Ingredients }

  • 1 L bottle of merlot wine
  • 1 cup of brandy
  • ½ cup of triple sec
  • 2 oranges, juiced
  • 1 apple, chopped
  • 1 orange, chopped
  • ½ cup chopped pineapple bits (I used fresh cut pineapple)
  • 1/2 cup fresh blueberries or blackberries
  • Sparkling Pomegranate Juice (I purchased mine from Trader Joes for $2.49)

{ To Make the Sangria }

In a mixing bowl, combine the chopped fruit, brandy, triple sec, and orange juice. Cover and allow to soak for 2 hours.

Add the wine to the mixture and allow to sit over night in the fridge. To serve, fill a glass with ice, fill ¾ with the sangria, and top off with a splash of sparkling pomegranate juice. Stir to combine.

 IMG_2047

Leave a comment

Filed under Cocktails, Recipes

Satay Stir Fry Sauce *****

DSC05830

When I am in need of a quick dinner, stir-fry is my go-to dish. I’ve always got an abundance of veggies in the fridge for my morning omelets, so I rarely even need to make a trip to the grocery store for ingredients. Plus, it doesn’t really matter what is in the dish (i.e. chicken, veggies, steak, tofu), because we all know the secret to an incredible stir-fry lies within the sauce.

Finding just the right sauce can be tricky though, which is why I am sharing this incredible recipe for Satay Stir Fry Sauce. It only requires a few ingredients and it makes just about anything taste amazing! The surprise ingredient is chucky peanut butter, which thickens the sauce and allows it to better adhere to the veggies and/or meat for a more flavor-packed bite. I love this sauce because it is just the right consistency and balance of Asian flavors—incorporating soy, orange, ginger, peanuts, and garlic.

Use this for vegetarian stir-fries with eggplant, mushrooms, onions, snow peas, and carrots served over rice or use it as a dressing/dipping sauce for grilled meat kabobs.

All you need is….

{ Ingredients for Satay Sauce }

  • 4 tablespoons chunky peanut butter
  • 3 tablespoons Tamari sauce
  • 3 tablespoons honey
  • 1 inch ginger root, peeled and minced
  • 1 clove garlic, minced
  • 1 teaspoons crushed red pepper flakes
  • 1/2 orange, juiced

{ To Make the Satay Sauce }

Combine all of the ingredients in a sauce pan over medium-high heat and stir until well combined. The peanut butter and honey should be dissolved.

DSC05789


DSC05791

DSC05825


DSC05835


Leave a comment

Filed under Asian Cuisine, Recipes

{ Cilantro Lime Vinaigrette }

Cilantro Dressing on Fajita Salad

I love Southwestern-style salads, but I hate the calories that come with Chipotle Ranch salad dressing. So I set out to make a healthier alternative with fewer calories. The result?

This flavorful cilantro-lime vinaigrette made with greek yogurt. The yogurt gives the dressing a smooth creamy texture without the fat, while also sneaking in some additional protein.

I use this dressing as a veggie dip, as a sauce for chicken and beef empanadas, and of course, for salads (my favorite is over spinach in combination with with my black bean corn salad recipe).

{ Ingredients }

  • 1/3 cup extra virgin olive oil
  • 1/2 cup 0% plain yogurt (I like Fage or Chobani)
  • 1 1/2 tbsp lime juice
  • 2 garlic cloves, minced
  • 1 tbsp white vinegar
  • 1 bunch fresh cilantro, roughly chopped
  • 1 tsp sea salt

Cilantro Lime Ingredients

{ To Make the Dressing }

  1. Place all ingredients in a food processor or blender and puree until smooth.

In food processord

  1. Continue to add olive oil 1 tbsp at a time as necessary to create a smooth finish.
Finished Dressing

Leave a comment

Filed under Recipes